How to made a webserver on a Raspberry Pi Zero
Hello World!
When setting up this website, I was lucky enough to have help from Figbert so things were not that difficult. However, I would still like to go over how I set up the website so that I can provide some help to people who decide to set up their own site in the future!
Step 1: Getting the Pi
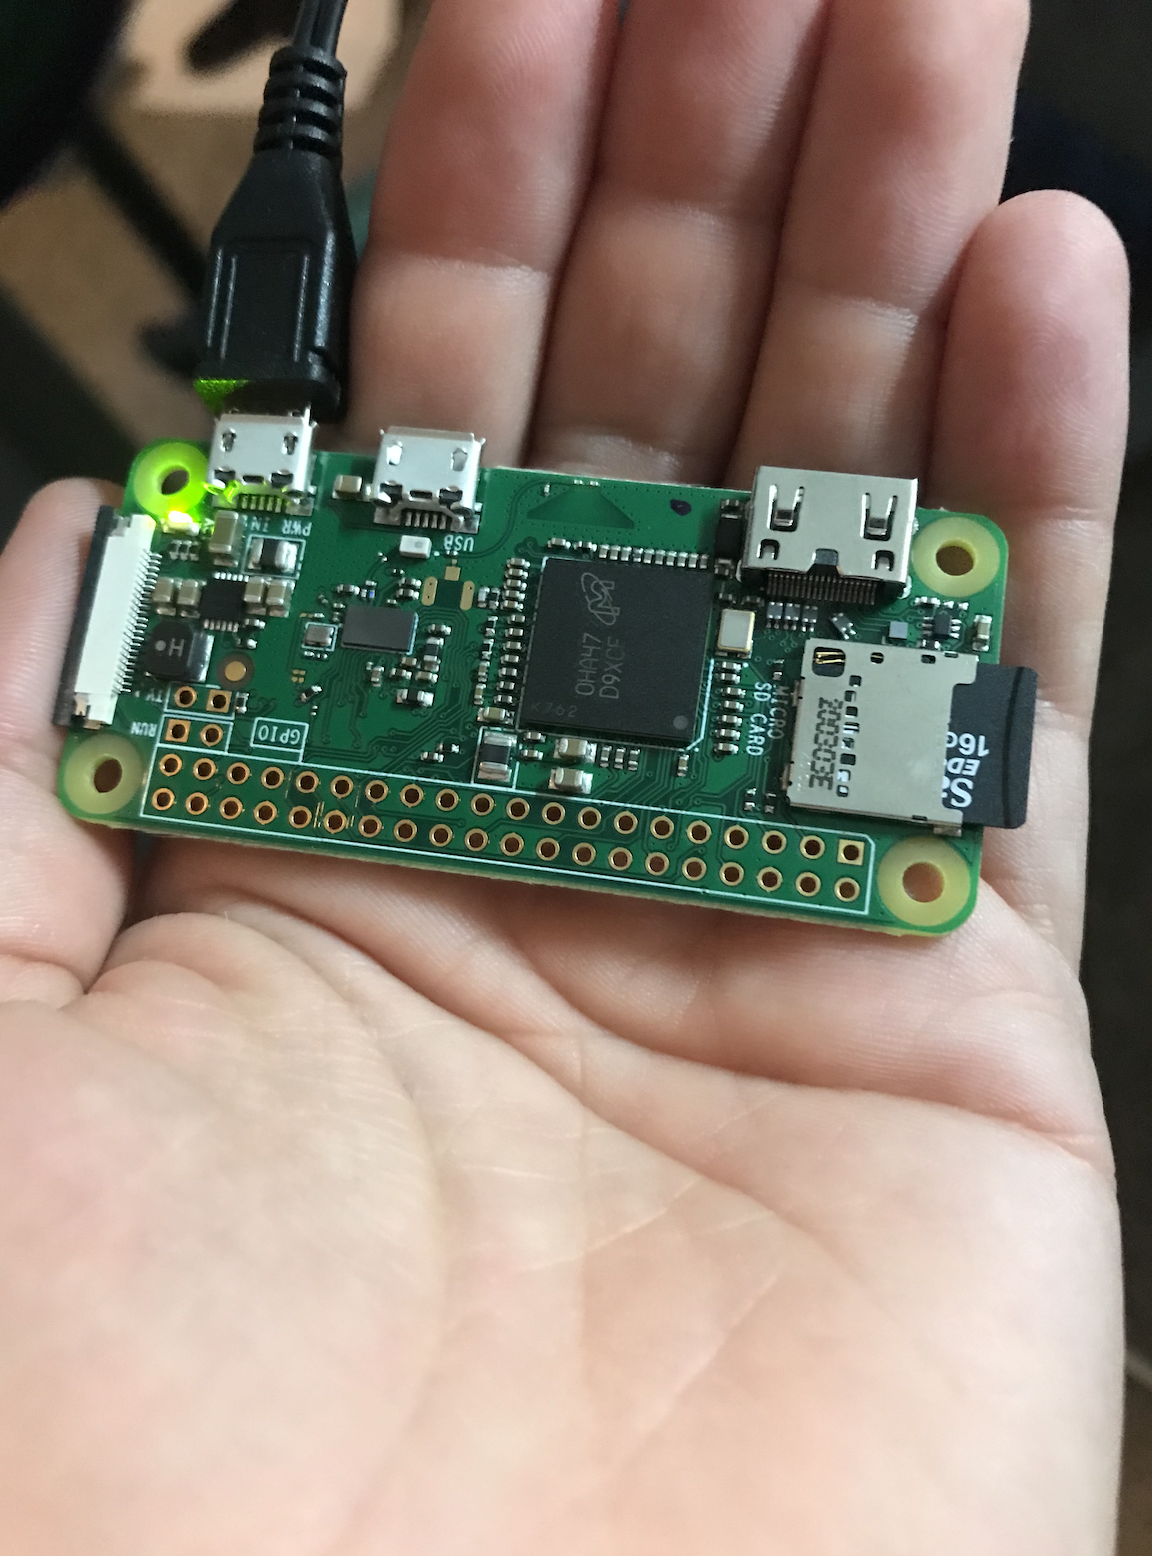
Deciding which Pi I wanted was fairly simple, because serving a website isn't that difficult. Since it wasn't all that hard, even a very small computer could do it and I chose the raspberry pi zero! The Raspberry Pi Zero is so small and cheap that it was once taped to the cover of the MagPi, the official Raspberry Pi magazine. It was originally $5, but then they improved it a bit to make the Raspberry Pi Zero W which is $10. I bought that, including a power cord and a micro SD card which brought it up to $24. The power cord is actually just a 2.5 amp microUSB cord, but I didn't know that at the time. I downloaded etcher and Raspbian Lite, plugged the micro SD card into my computer using an adaptor that I already had lying around, and flashed Raspbian Lite onto my micro SD card.
Step 2: Programming the Site
I'm fairly good at HTML and CSS, which are the two main languages used to build websites, but I still used a template just to make sure the site looked nice. I based it off the kreative stylesheet, but as you can probably tell looking at their site I made a good number of edits to the HTML, but I still used the majority of their CSS stylesheet. I used the WebStorm IDE.
Step 3: Setting up the server
I started with the Apache2 server, but it didn't work
and Figbert suggested that I use a Caddy server. Caddy
has a couple things going for it. Firstly, it automatically upgrades to https. Https is much
more secure than http, and it can also be harder to set up. Caddy makes it much easier! It also
has no dependencies, so you don't have to do any setup before installing it. It also has some
neat features that I'm not using just yet, such as Kubernetes ingress, that I don't use yet but
might at some point in the future! Setting up a Caddy server is very simple. First, you ssh into
your raspberry pi, and navigate to the /var/www/ directory. Then type sudo
apt install caddy to install the Caddy server. After that create a Caddy file in the
/var/www/ directory, and name it Caddyfile (very original). It should contain:
                        www.burningsilicon.dev{
                        redir https://burningsilicon.dev{url}
                        }
                        burningsilicon.dev {
                        root * /var/www/
                        encode zstd gzip
                        file_server
                        }
where 'burningsilicon' is what you want your domain to be. Upload your code to the caddy
server, specifically the /var/www/ directory. At this point, you should be able
to navigate to your pi's ip address in your browser, and view your site!
Step 4: Buying the domain name
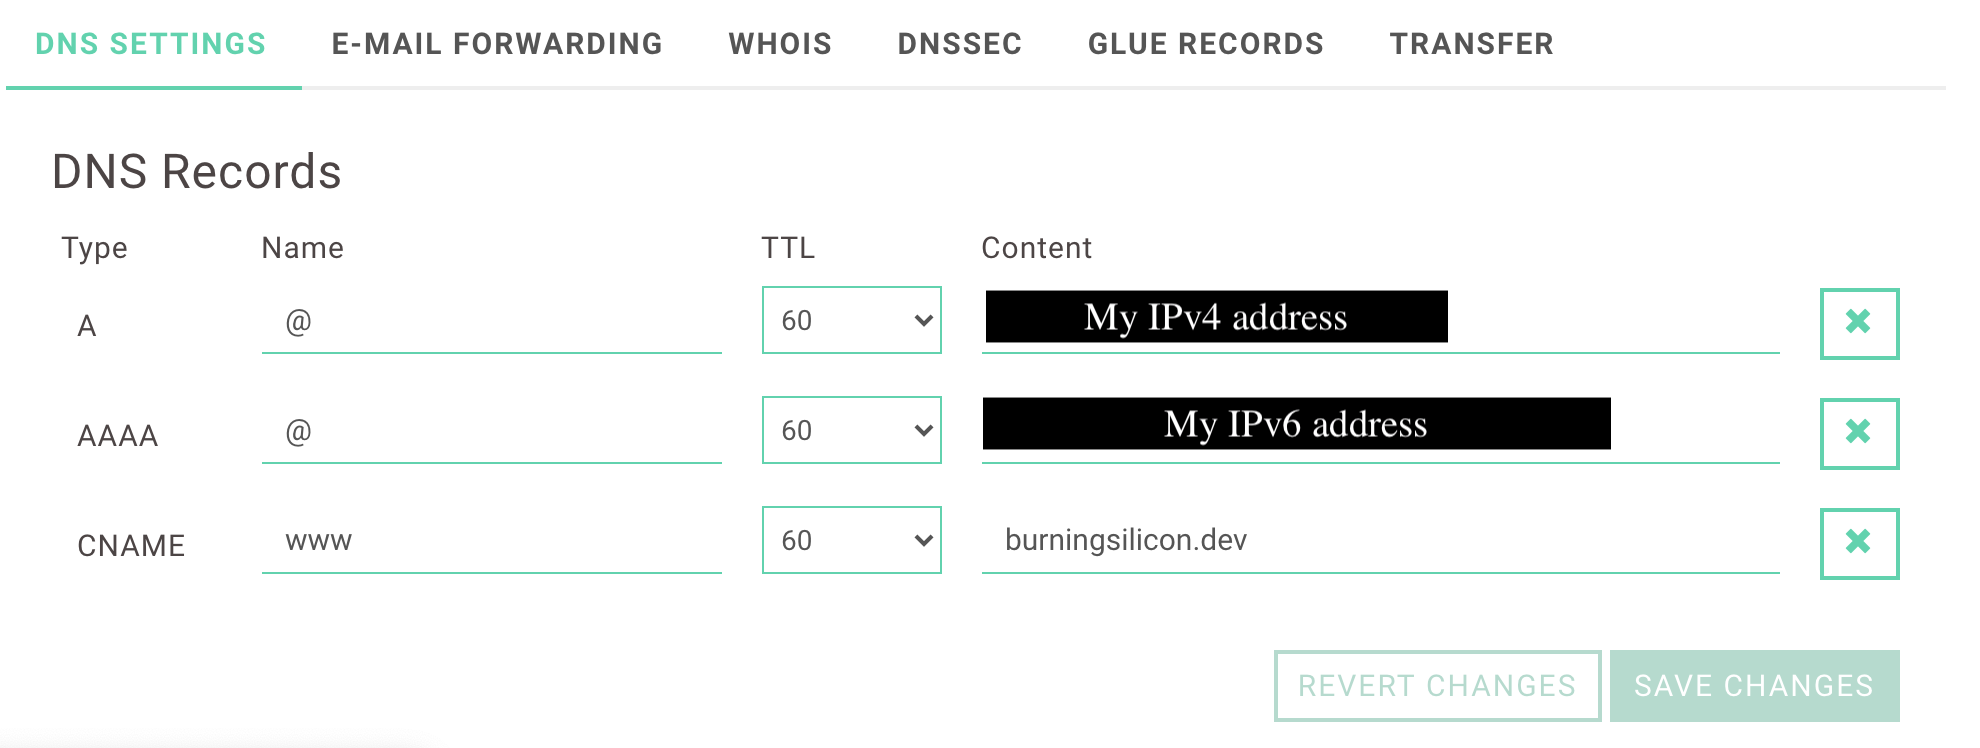
I bought my domain name from Njalla, since it seemed to be very respecting of privacy. The only downside is that you can only pay them in crypto or PayPal, and since all I own is 0.00467 Bitcoin Cash (don't ask_, I had to get a PayPal. After buying the domain burningsilicon.dev, I went to the DNS Settings tab, and set it up like you see in the image below. If don't know what your ip address, literally just google 'my ip address' and it will tell you!
Step 5: Redirecting https and http requests to your pi
So as of now, when a person types in your domain name, they are redirected to your wifi router.
In addition, when you type in your pi's ip address while on your wifi, you can see your website.
There is one final step before you are finished with your site! This is unfortunately specific
to your router, but I can show you how to do it with netgear, which is my router.
Go to routerlogin.net and navigate to Advanced -> Advanced Setup -> Port
Forwarding/
Port Triggering -> Select Custom Service. Service Type is TCP/UDP, External Starting Port and
External Ending port are both 443. This is because https requests are made to port 443. If for
some reason you wanted ssh requests to navigate to your Raspberry Pi, you would type 22. But
don't do that, that would be weird. Then select your pi's IP address and you're done! If for
some reason you want http requests to also work when talking to your pi, then do the same thing
but with port 80. Don't do that though, it's insecure.
Step 6: Comments, likes, and contact
I added a comment feature using the most privacy-respecting service I was aware of: Hyvor! You just have to embed some HTML wherever you want the comment system to be. And FreeContacForm was a very simple contact form to set up, so I used that one.
After that you should be done! Please contact me if it doesn't work or you have any questions.Thanks for visiting my new site!
May you be ever victorious in your endeavors. M.E.W